 Grand Rapids, MI
What’s the consensus or suggestions for when to use #6 or #8 screws for bottom coil assemblies on new playfields?
(Topic ID: 222566)
Quoted from zimzam:What’s the consensus or suggestions for when to use #6 or #8 screws for bottom coil assemblies on new playfields?
Standard design on most pins 80s/90s era I've worked on seems to be #8 for mechs/solenoids, #6 for everything else (lamps, switches, etc ). Seems logical to use heavier screws for stuff that vibrates and such, but I suppose I'm not convinced it's necessary either.
Quoted from Ollulanus:Standard design on most pins 80s/90s era I've worked on seems to be #8 for mechs/solenoids, #6 for everything else (lamps, switches, etc ). Seems logical to use heavier screws for stuff that vibrates and such, but I suppose I'm not convinced it's necessary either.
Thank you sir. Much appreciated.
Drilling out clear keeps coming up. A lot of people are worrying over it, but I’ve lost count of how many playfields I have restored or swapped out, and here’s what works for me:
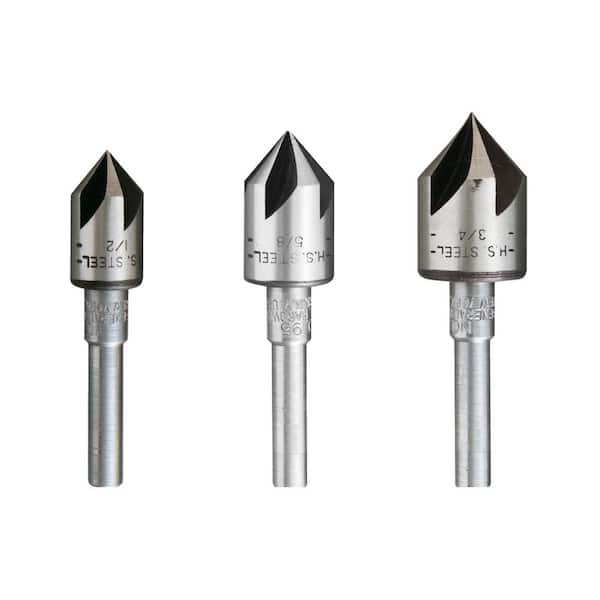
Get a small countersink, the kind that looks like a plumb bob. Doesn’t really matter if it’s a small medium or large, you’re host gonna use it to slice the clear away from the 3/32” holes you drill for post screws primarily.
https://images.thdstatic.com/productImages/e0ac7e7f-9157-435f-aa3d-aa818d41861c/svn/general-tools-countersink-bits-195st-64_600.jpg
Use the countersink pretty much everywhere you’re going to be putting a screw. You don’t really need to worry about it on machine threaded screws, but I’m you won’t hurt anything by doing holes that didn’t need it. It’s probably wider to err on the side of caution.
After many playfields, I feel that there is an excess of caution around pop bumper nails. Slicing all of the clear away from the head is a somewhat high risk maneuver that just isn’t necessary. The clear should be pliable enough to yield to the nail head as it sets from gently being tightened. If it’s not, there is either too much clear or someone has used an accelerant, making the clear more brittle than you want it to be.
Quoted from zimzam:What’s the consensus or suggestions for when to use #6 or #8 screws for bottom coil assemblies on new playfields?
I hate #8 screws in playfields. Hate them.
I’ve had old playfields where the threads were torn out from age or from people over tightening, or removing and replacing brackets without turning the screw backward to “find the thread” first. Whatever the cause, a torn out #8 screw hole gives you no recourse except to glue a tapered (preferably hardwood) dowel in the hole and re-drill, unless you have the option to pivot the bracket (sometimes a possibility with flippers.)
When I’m populating new playfields, I *always* use #6 for all coil brackets. The Williams sys7-WPC machines I have worked on used #6 exclusively and without issue. Older Stern and Bally machines used #8 on flippers and drop banks, but on repro playfields I mount them with #6.
My reasoning is: there’s no inherent greater performance using #8 screws (or, more to the point , no tendency to failure from #6) that I have seen. Down the line, if for *whatever reason* a #6 screw gets stripped out, it can be replaced with a #8 since the prior screw has effectively pre-drilled the hole for you. And the #8 should then have good purchase for a long time.
I keep both screws in my inventory. When repopulating a restored playfield I often have no choice, but increasingly I will just plug the old #8 holes with wood dowels and start over using #6 screws. If for whatever reason a #6 tears out, I can move to the #8 without having to stop what I’m doing and glue in a dowel. If the old #8 hole is solid, I will reuse it, but more and more I don’t trust those big cavities in 40 year old plywood to hold the screws securely over time.
If you need to know if a #6 or #8 screw is strong enough for your task, easy math in section 7-9:
https://woodweb.com/Resources/wood_eng_handbook/Ch07.pdf
Figure a cheap #6 screw is 121 pounds in shear and 38 pounds of withdrawal at 3/8" penetration in maple ply... assuming a fresh hole
How many screws do you come across that have sheared off though? Posts do it all the time, but screws should really never shear off under these conditions. Stripping and backing out? All the time.
Quoted from SpyroFTW:How many screws do you come across that have sheared off though? Posts do it all the time, but screws should really never shear off under these conditions. Stripping and backing out? All the time.
On guitars and playfields, my entire life has been spent removing broken screw shafts, lol
 666 (resized).jpgheadstock (resized).jpg
Quoted from vid1900:If you need to know if a #6 or #8 screw is strong enough for your task, easy math in section 7-9:
https://woodweb.com/Resources/wood_eng_handbook/Ch07.pdf
Figure a cheap #6 screw is 121 pounds in shear and 38 pounds of withdrawal at 3/8" penetration in maple ply... assuming a fresh hole
So does that mean a #6 is sufficient for all under playfield assemblies in fresh new playfield holes?
Quoted from zimzam:So does that mean a #6 is sufficient for all under playfield assemblies in fresh new playfield holes?
Another consideration is that if the holes in mechs are drilled for #8, they might have **play** as the mechs activate over time
I am populating a new DE Star Wars CPR playfield and I am at the point of installing the larger wire guides. For the small ones, I followed Vid's instructions (2 step drilling, barbs filed) and I am quite pleased with the results. However, the CPR pre-drilled holes for the larger wire guides are already slightly bigger than the diameter of the guide. So I think filing the barb wires would not allow me to install the guides tightly. And I am afraid that installing them as-is would damage the clear. What would be the best strategy in this case ? I am tempted to enlarge the hole at the barb locations only to guarantee that they will not touch the clear when inserted but would appreciate some advice. Thanks !!!
Jack
wire rail (resized).jpgQuoted from pbjack:rbs filed) and I am quite pleased with the results. However, the CPR pre-drilled holes for the larger wire guides are already slightly bigger than the diameter of the guide. So I think filing the barb wires would not allow me to install the guides tightly.
Maybe score the 2 spots where the barbs will hit with an xacto knife.
Or plug the holes with bamboo, and re-drill the correct size hole.
Or put some 5 minute epoxy in the holes
Or....
Quoted from vid1900:Maybe score the 2 spots where the barbs will hit with an xacto knife.
Or plug the holes with bamboo, and re-drill the correct size hole.
Or put some 5 minute epoxy in the holes
Or....
I have done the epoxy before. Mask off the area around the hole and add via a toothpick. Works great.
Quoted from sethbenjamin:I honestly don’t understand why anyone would need to wax their screws if they are pre-drilling, which you should definitely be doing.
Bally has a part number for screws that have a wax coating. I guess you can have hardware
made with special coatings that I never really new.
Quoted from vid1900:Maybe score the 2 spots where the barbs will hit with an xacto knife.
Or plug the holes with bamboo, and re-drill the correct size hole.
Or put some 5 minute epoxy in the holes
Or....
Quoted from SpyroFTW:I have done the epoxy before. Mask off the area around the hole and add via a toothpick. Works great.
Thans for the tips, I had not considered epoxy and it seems like an easy solution. Glad I asked.
Quoted from sethbenjamin:Whatever the cause, a torn out #8 screw hole gives you no recourse except to glue a tapered (preferably hardwood) dowel in the hole and re-drill, unless you have the option to pivot the bracket (sometimes a possibility with flippers.)
Squirt wood glue in the hole and line it with round toothpicks. Clip them off flush. Insert screw in the center gap. We've used this technique on arcade pins for 20+ years, with lasting results.
Quoted from vec-tor:Bally has a part number for screws that have a wax coating. I guess you can have hardware
made with special coatings that I never really new.
I’m guessing that’s because they don’t pre-drill when they assembled these things in the factory.
Quoted from MR-808:Squirt wood glue in the hole and line it with round toothpicks. Clip them off flush. Insert screw in the center gap. We've used this technique on arcade pins for 20+ years, with lasting results.
Sure, but I’ve also restored machines where this fix has not held. I take small strips of hardwood and chuck them in the drill press, then sand them down to a snug tapered dowel.
If toothpicks work for you, great, I’m not gonna argue to point; I’m from a cabinetry background and am anal retentive.
Quoted from sethbenjamin:Sure, but I’ve also restored machines where this fix has not held. I take small strips of hardwood and chuck them in the drill press, then sand them down to a snug tapered dowel.
If toothpicks work for you, great, I’m not gonna argue to point; I’m from a cabinetry background and am anal retentive.
I'm using bamboo skewers now for thread/hole repairs.
Much better than basswood toothpicks and similar to a hardwood dowel plug as far as durability, maybe better.
Quoted from pinballinreno:I'm using bamboo skewers now for thread/hole repairs.
Much better than basswood toothpicks and similar to a hardwood dowel plug as far as durability, maybe better.
I have a bottomless supply of European beech in the shop.
When I make cabinet doors and face frames, there’s the initial phase of milling down the rough sawn parts. I often end up with thin strips from that process; these get sliced to short lengths and bundled, as they are very good dowel stock for such repairs, as well as good glue spreaders or mixing sticks - or, world-class kindling. If I were an outdoorsman I would toss a packet of this stuff in my bag for getting a campfire started.
Quoted from pinballinreno:I'm using bamboo skewers now for thread/hole repairs
Interesting about bamboo - since it is technically a grass, its fibers may in fact be better than any wood, since wood grain has direction and using any dowel for a hole repair means going into end grain.
It may be a purely academic distinction, though, since really you’re removing most of the material you put in there once you pre-drill and drive the screw. But, I’m a lunatic who spends way too much time in the shop pondering over process, so take my observances with that grain of salt ![]()
Bamboo is harder than Maple, so it's an ideal plug.
If you get a bag of "BBQ skewers" at the dollar store, there is a random selection of diameters, so one of them will be perfect.
Put a little glue in the hole, tap in the skewer, snip flush with diags, and run your screw. You don't even have to wait for the glue to dry.
Wanna join the discussion? Please sign in to reply to this topic.

Great to see you're enjoying Pinside! Did you know Pinside is able to run without any 3rd-party banners or ads, thanks to the support from our visitors? Please consider a donation to Pinside and get anext to your username to show for it! Or better yet, subscribe to Pinside+!

This page was printed from https://pinside.com/pinball/forum/topic/vids-guide-re-populating-playfields/page/5 and we tried optimising it for printing. Some page elements may have been deliberately hidden.
Scan the QR code on the left to jump to the URL this document was printed from.
 Sana'a
 Montréal, QC